
Any underwater photographer who has tried their hand at making images at night knows this endeavor comes with its own set of challenges. For starters, you need to know your way around your camera system by feel because it is not always possible to clearly see the various controls for a camera or strobe. If you need to make an adjustment to one of your settings, it is all too easy to grab or depress the wrong knob, wheel, or button, or turn a knob or wheel in the wrong direction without realizing the error of your ways.
Knowing your way around your camera system by feel takes practice. You can practice in the comfort of your home, in a pool, and on day dives, but practice, you must. The upside is that mastering this skill pays big dividends.
Acquiring proper exposures requires more precision at night. During daylight hours, you can often use sunlight to properly expose or help expose your subject or scene. Good use of sunlight can be especially helpful when working with big animals during the day, especially in relatively bright water near the surface,
manta ray and freediving videographer
when trying to expose a subject that is difficult to get close to, and when intending to create a water background that is not black, as was the case when I made this photograph of a whitemouth moray eel in Kona

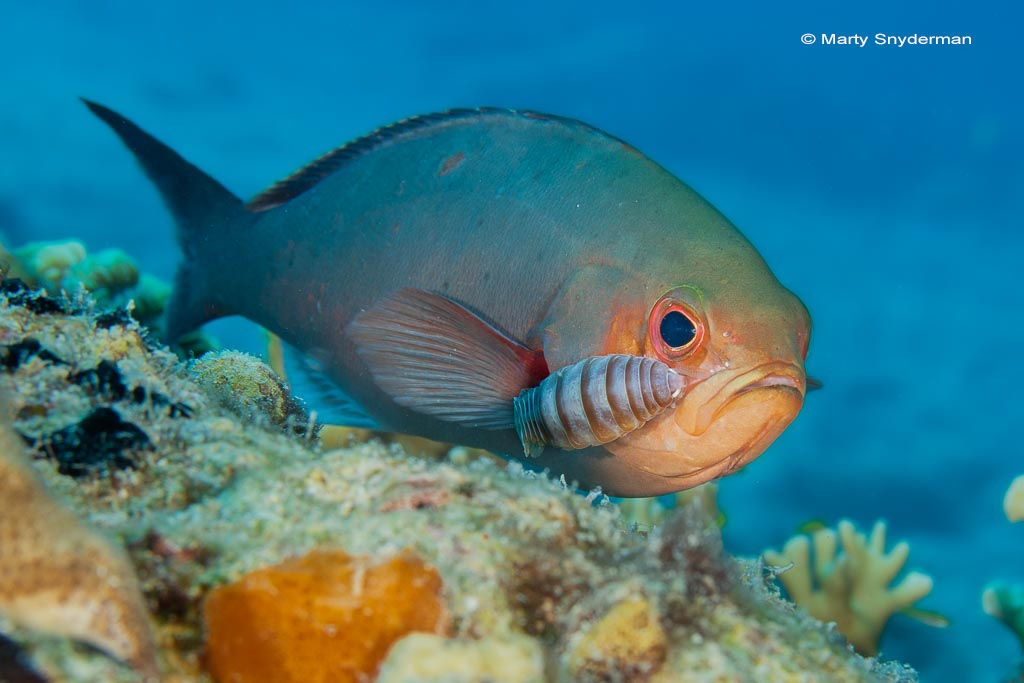
and this image of a creolefish that is carrying a soldierfish isopod on its face.
But at night, your exposure is totally dependent upon how you use your artificial light(s), whether a strobe(s) or continuously burning video light(s), to light your subject.
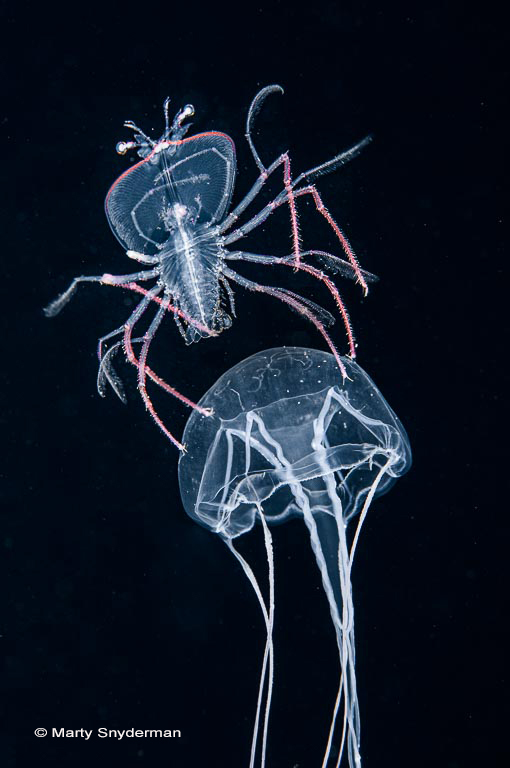
larval slipper lobster riding on a jelly in the open sea at night in the waters off Kona, Hawaii
Miss your exposure at night and your image is highly likely to soon be on its way to the cyber trashcan courtesy of your computer’s delete function.
Aim your light(s) slightly upward
I think it’s fair to say that a lot of nighttime photography takes place with relatively small subjects from close range while on or very near the sea floor. In that scenario, a common mistake involves pointing your strobe(s) or video light(s) at too severe of a downward angle. This results in the creation of distracting, overexposed hotspots in the foreground of your photographs.
Instead of aiming your light(s) downward, try aiming them straight ahead or even slightly upward, depending upon the angle-of-coverage of the emitted beam(s) from your light(s). The goal with this technique is to light your subject while avoiding the creation of a grossly overexposed foreground.
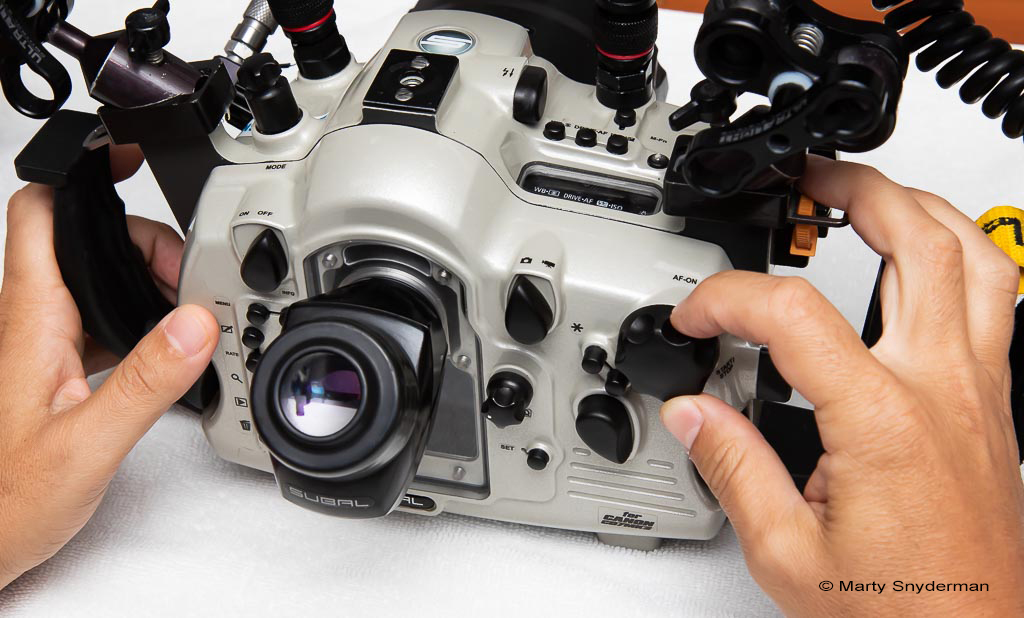
Clearly, you need a good dive light to help you find your subjects, compose your frames, and focus your lens. Thankfully, a selection of good lights for underwater photography is readily available. You also need a way to mount the light to your camera system, while also being able to manipulate the light so you can aim it where you want to.
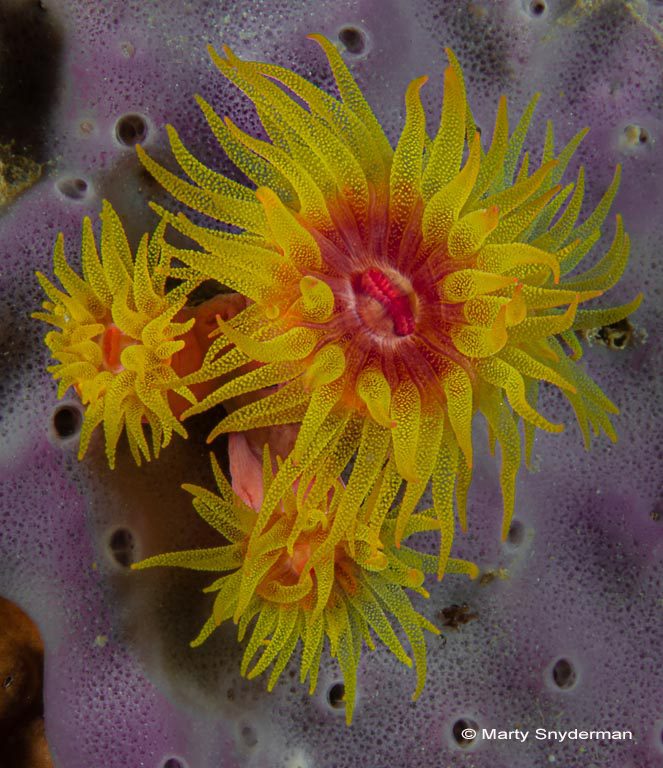
One of the great rewards of night photography is getting the opportunity to photograph a lot of creatures we don’t usually encounter or get a good look at during daytime dives. Examples include feeding coral polyps with their tentacles extended seen here, slipper lobsters, eels, snails, and myriad other creatures that emerge from the sandy bottom on the sea floor.
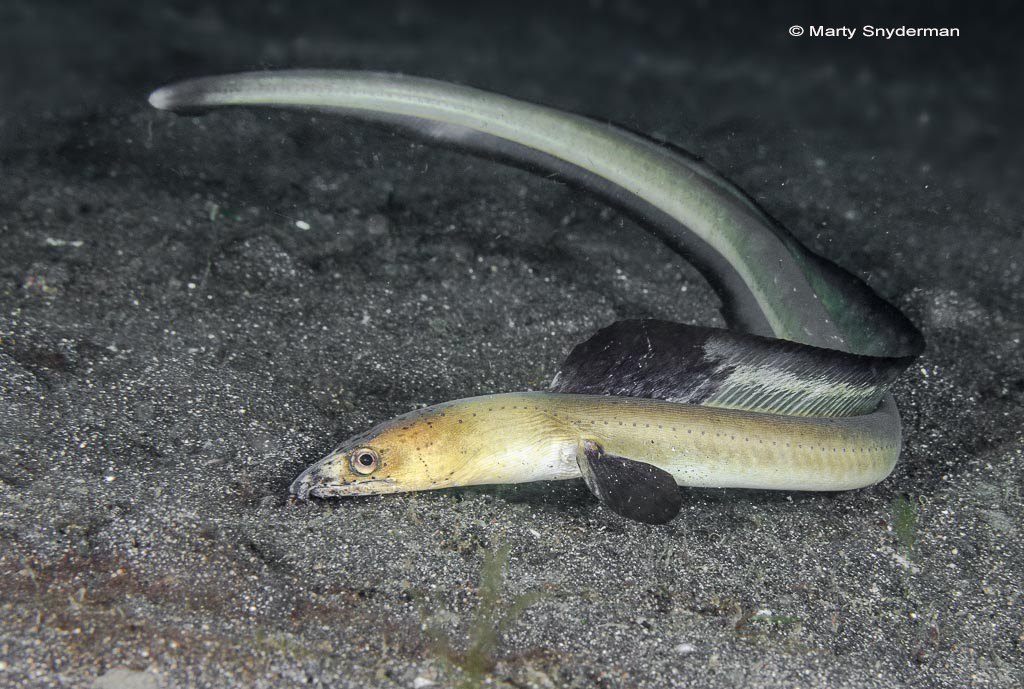
black-finned snake eel
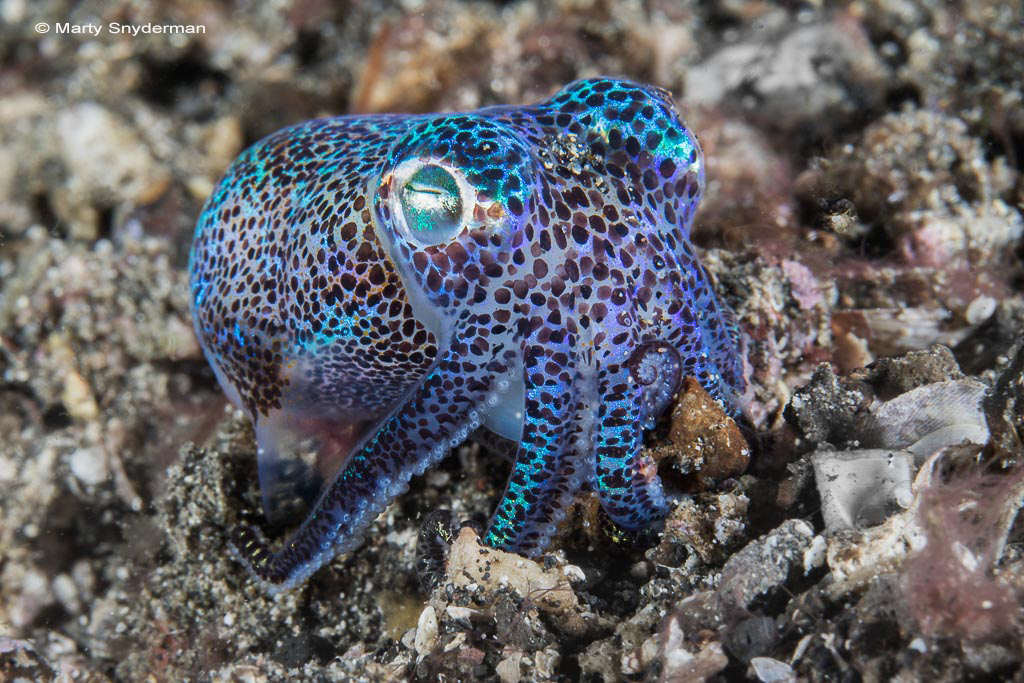
In addition, night divers often enjoy better encounters with squids and octopuses after the sun sets.

Caribbean reef squid
bobtail squid

Caribbean reef octopus

Starry octopus
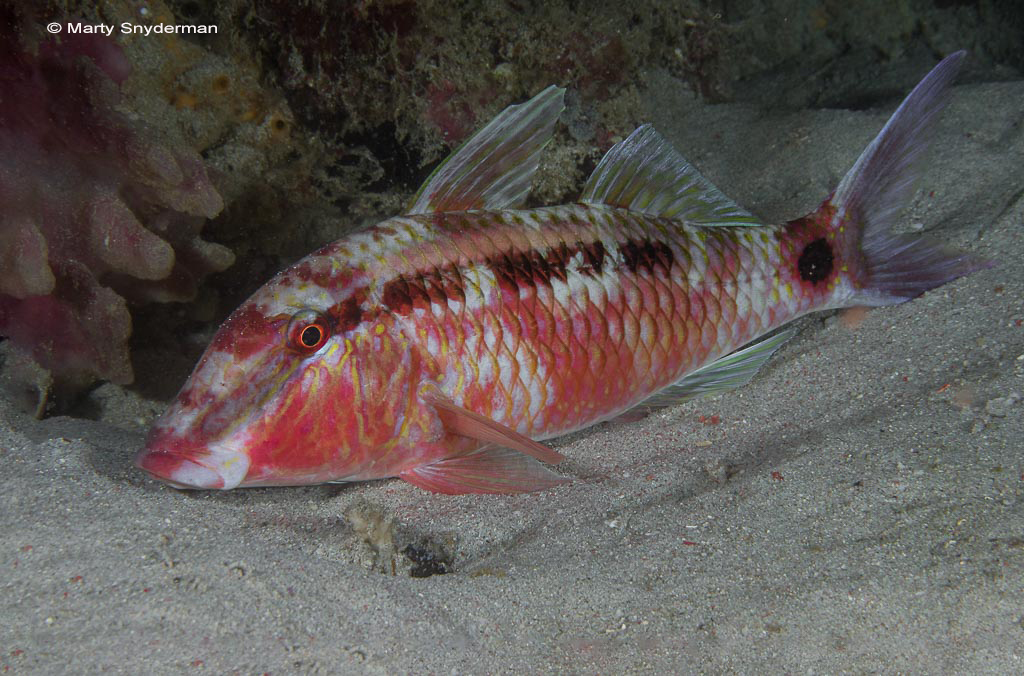
Fishes that sleep out in the open, like this dot-dash goatfish,
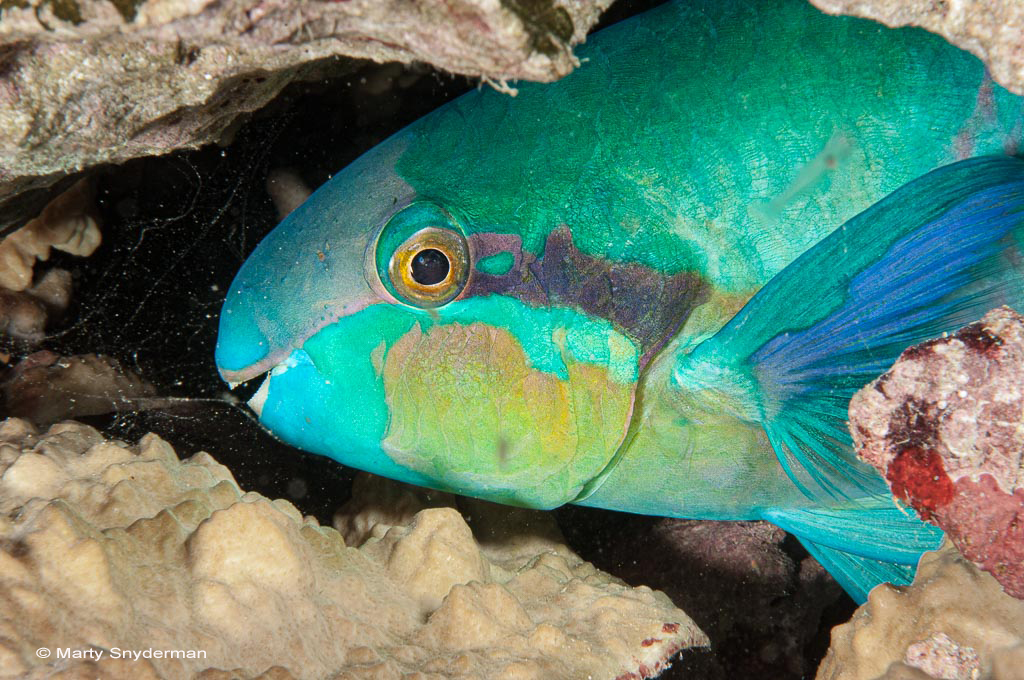
and this parrotfish also provide nocturnal opportunities,
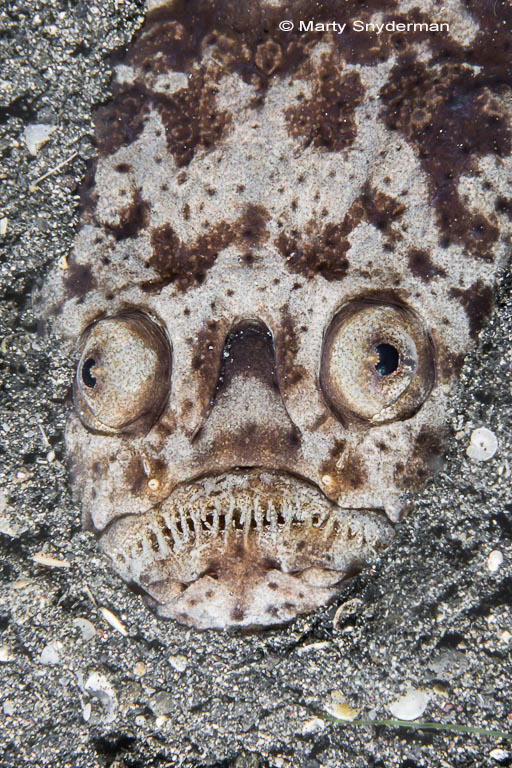
as does this stargazer, a lie in wait nighttime hunter.
Of course, there is a lot more to creating a compelling image than just encountering your subject. Many creatures of the night don’t like bright light, and this subset of animals is often quick to flee if you shine a bright light on them. On the other hand, some nocturnal animals don’t seem to mind. Other animals seem to be somewhere in between these two extremes.
As a nighttime photographer, your challenge is to determine the best approach for each potential subject. Over the years I have found that it often works well for me to try to illuminate a potential subject with the dim, periphery of the beam emitted by my dive light when I first encounter it. I watch closely to see how my potential subject reacts. If my quarry freezes like a “deer in the headlights” I can often use the brightest power setting on my dive light and point the light directly at my subject. This technique makes composing and focusing relatively easy.
If my potential subject seems wary of the light, I often find that using the lowest possible power setting on my light and illuminating the subject with the dim periphery of the beam gives me the best chance to get my shot. Framing and focusing in dim light takes practice but can be done. Pre-focusing while using the bright center of the your light’s beam by aiming the light at an object that is the same distance away from your camera that you think your subject will be but away from your subject can be a helpful technique. Once you have pre-focused, return to your subject and aim your light so the area directly in front of your lens where your subject will be is illuminated by the periphery of the beam. Then approach your subject and compose your frame.
I used this pre-focus, dim light technique to create the image of the skittish red reef lobster
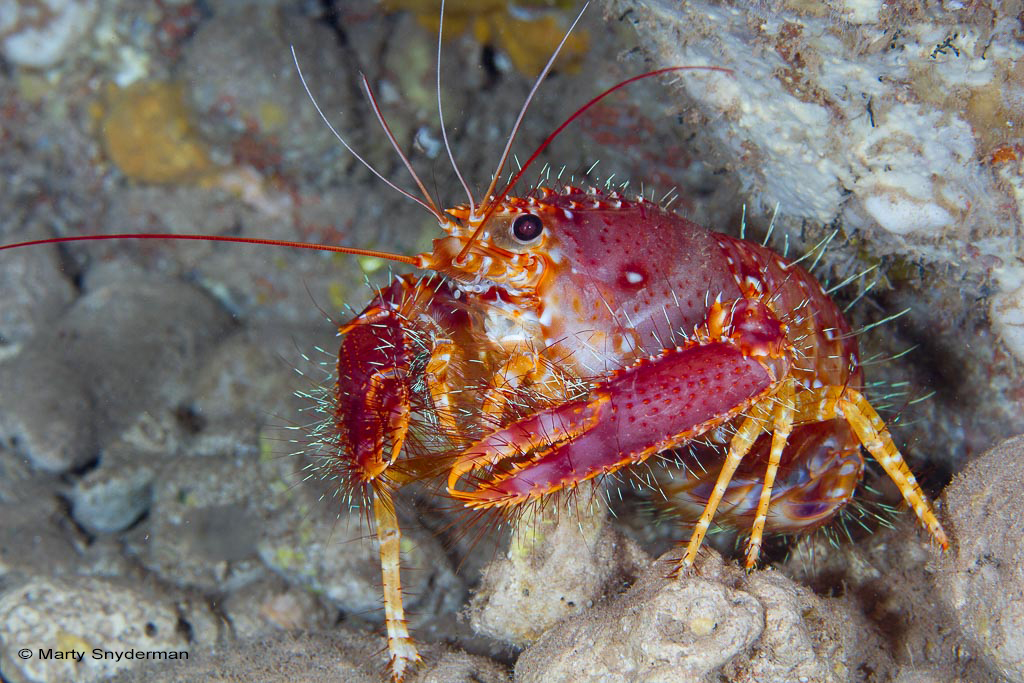
and brittle star on a sponge seen here.

In addition, using a red filter over your light, a feature available with some lights, to minimize the number of planktonic creatures that might have otherwise be attracted to the beam of your dive light, can prove highly beneficial. A white beam of light emitted sometimes attracts a host of planktonic organisms that are swimming in the water column. Their presence can lead to ruinous distractions.

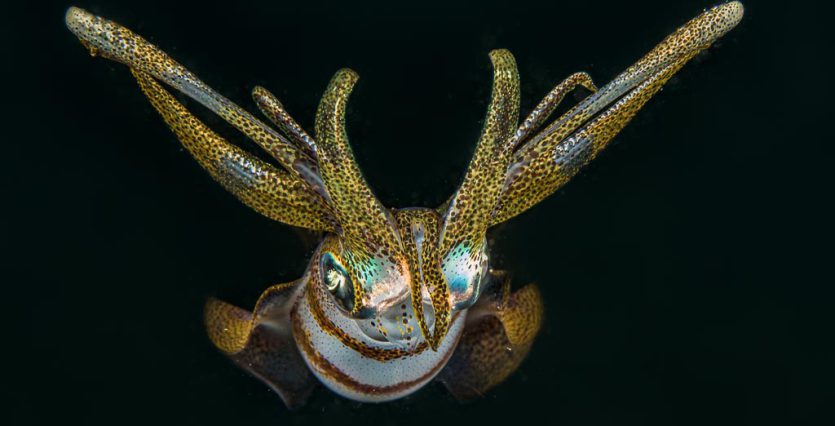
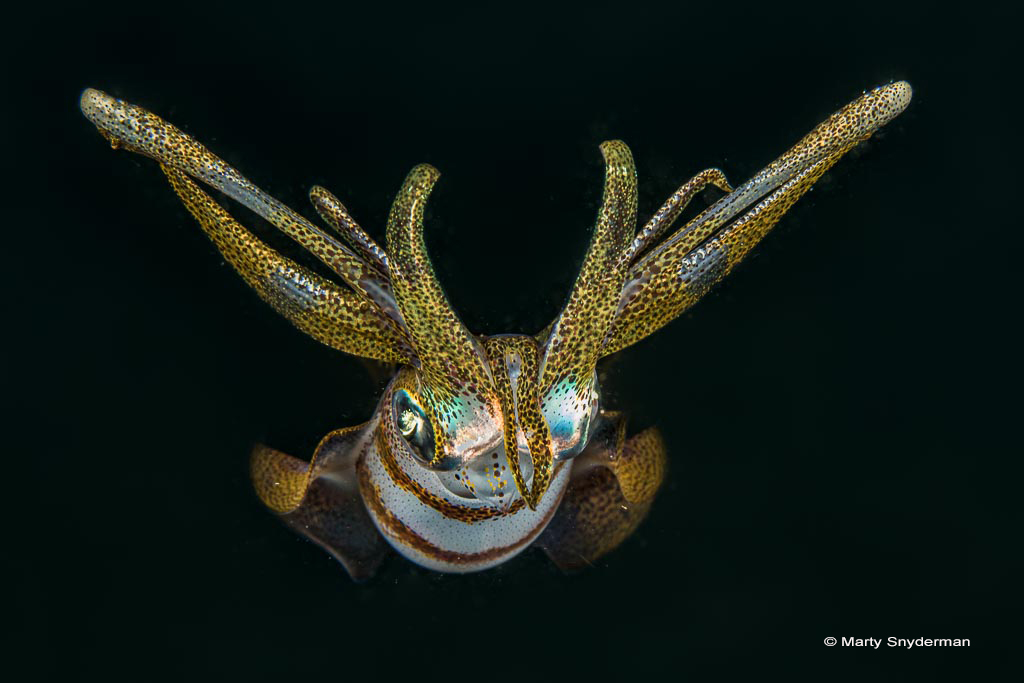
Having a quick-thinking, helpful buddy can be a huge asset when shooting at night. Certainly, it was for me when I made this photograph of a bigfin reef squid (aka longfin reef squid) at night in the Philippines. Sometimes, bigfin reef squid are incredibly cooperative subjects as they face directly into the light, thus looking toward the camera while remaining in place or with very little movement. But that was not the case with this squid. No matter how dim my red-filtered light was or how far into the periphery of my light’s beam the squid was, this wary cephalopod instantly turned away from me. A butt shot was the best I could do until I turned my light off and my quick-thinking dive buddy positioned himself on the opposite side of the squid and pointed his light at my desired subject. The squid turned away from my buddy’s light, so it faced right at me. I was able to use my buddy’s light to focus and get this shot, an image I was unable to get on my own.
As is the case when making photographs during the day, successful photography when diving at night is likely to depend on your knowledge of photography, your familiarity with your camera system, the degree to which you have mastered the required skills, your ability to carry out the needed tasks in an efficient manner, and, of course, making some night dives. The more, the merrier!
Of course, a helpful buddy and a little luck can also be big assets. But whether or not you make a great photograph, remember to enjoy the entire photographic process, not just your processed images.