
For most underwater photographers, one of their bigger challenges is consistently acquiring proper exposures. If exposures are inconsistent or way off the mark, no matter how strong the composition is, an image is far more likely to end up in the cyber trashcan than it is to bring a smile to the photographer’s face. Developing the skill of consistently acquiring proper exposures is analogous to building a solid foundation when constructing a house. Master this skill and you can spend your photographic dives concentrating on composing the images you want to create instead of guessing about your exposures and simply hoping for the best while knowing you can count on properly exposing your images.

Metaphorically speaking, if you fail to master the fundamental skill of knowing how to acquire proper exposures, you will be living in a house of cards. In that scenario, your ability to take advantage of your photographic opportunities depends on getting lucky. That’s not where you want to be when you have a great, but fleeting opportunity in front of you.
This article deals with simplifying exposures. The goals are to help you understand:
- that there are four, and only four, exposure scenarios (with a caveat explained later),
- which exposure-related scenario applies at any given instant, and
- what to do in each of the four scenarios to consistently acquire proper exposures.
The four exposure scenarios are as follows:
- when sunlight is the only light source used to illuminate a scene or subject and you want to show colors and detail from the scene or subject in a photograph,
- when creating silhouettes,
- when an artificial light, meaning a strobe(s) or constantly burning video light(s), is the only light source illuminating the scene,
- scenes exposed by coordinating the use of sunlight and artificial light.
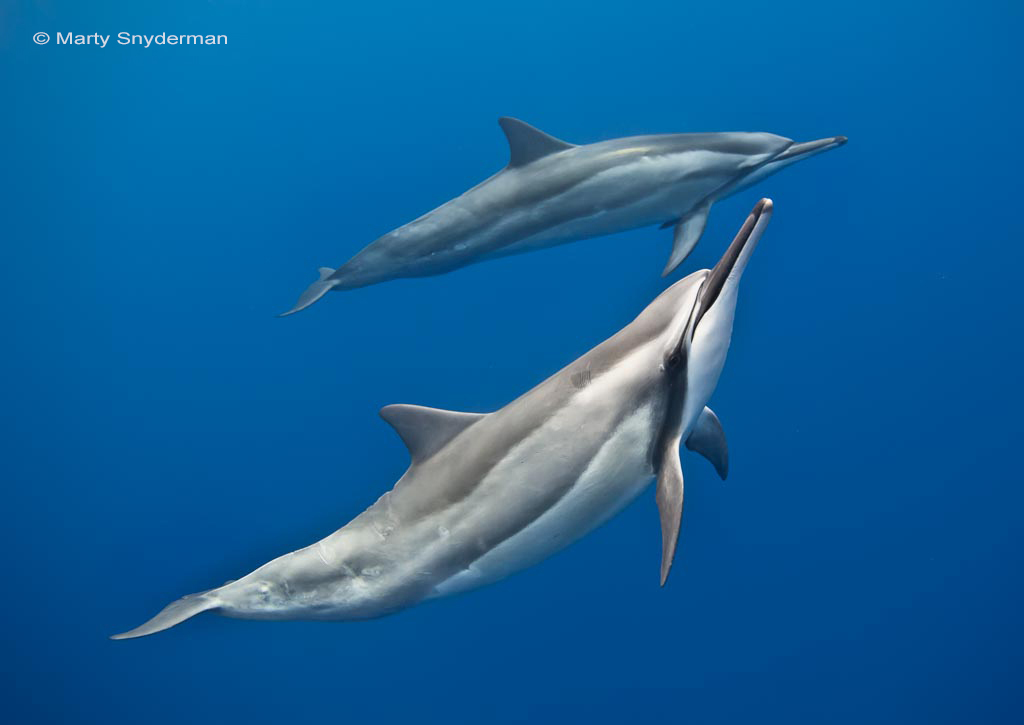
This photograph of a pair of spinner dolphins is an example a scene in which
sunlight was the only light source used to expose the scene.
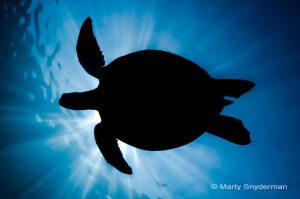 This photograph of a green sea turtle is an example of a silhouette.
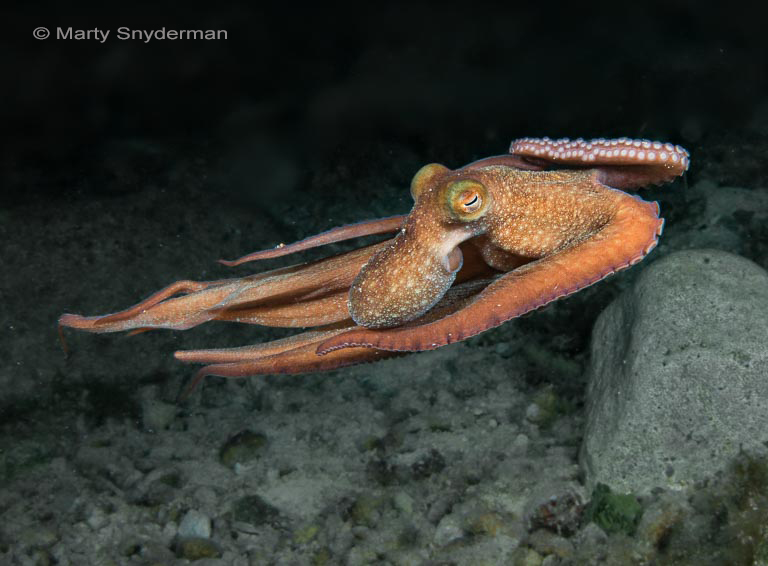 This photograph of a Caribbean reef octopus is an example of a scene in which the
light illuminating the scene came entirely from an artificial light source, my strobes.
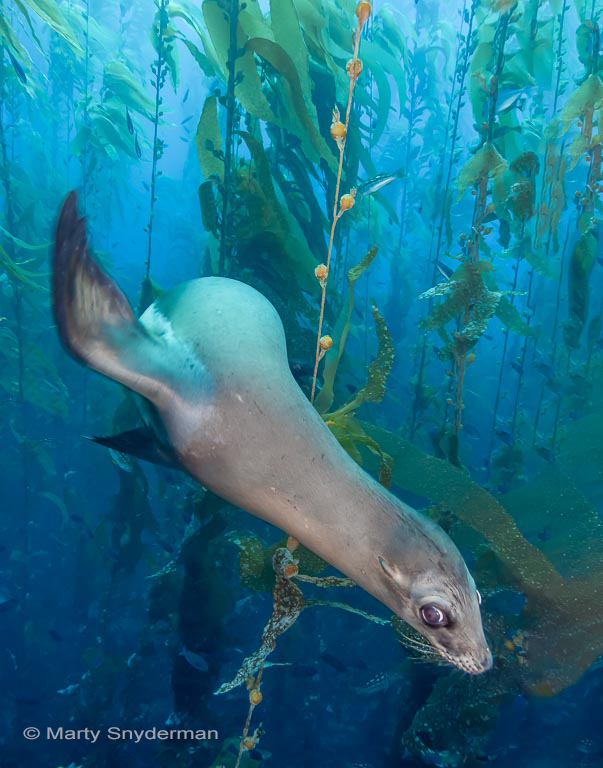 This photograph of a California sea lion cruising through a southern California kelp forest
is an example of a shot that involved coordinating sunlight and light emitted by strobes.
The caveat mentioned above is that there are additional exposure scenarios in which more than one artificial light source is carried by a diver(s) or positioned in a cave, on a wreck, on a deep wall etc. Those techniques are outside of the scope of this article.
In this article, I am going to dive into the first two exposure scenarios while considering what factors to look for and the steps to take to consistently acquire proper exposures. In the first exposure scenario, sunlight is the only light source involved in exposing the shot and you want to share the details and/or colors in the subject or scene you are photographing. To capture the best results, you will want to be in shallow water with good visibility on a sunny day. These factors will help your subject standout clearly in your photograph. When possible, you want to shoot between mid-morning and mid-afternoon. In addition, you want the sun to be at your back or over your shoulders.
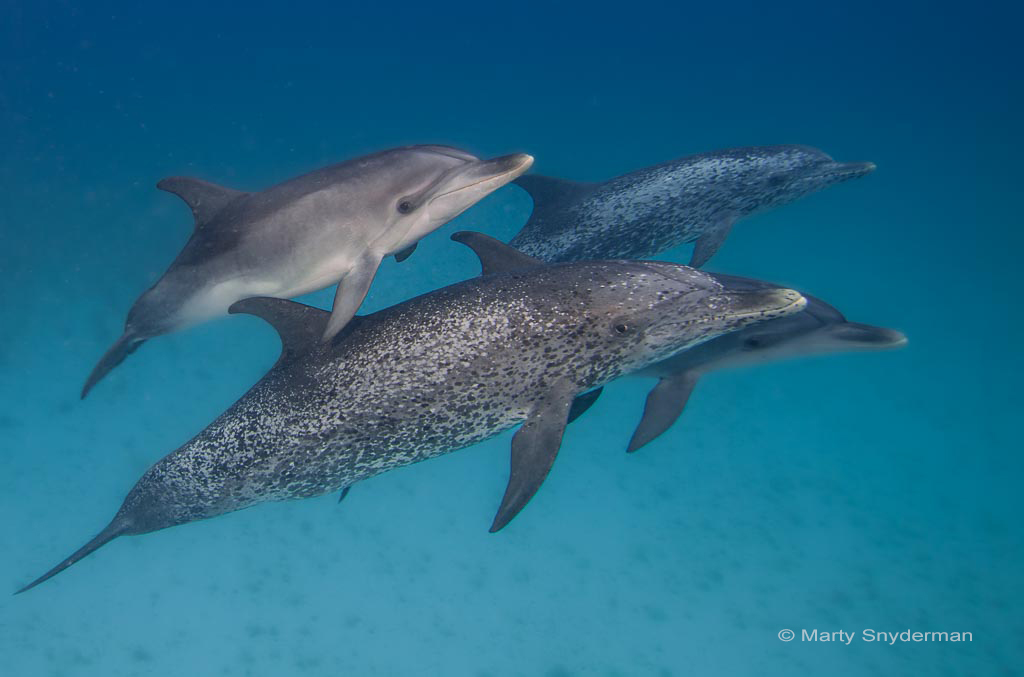
It is usually best if the entire scene is evenly lit with no large areas that are extremely dark or extremely bright as was the case when I made this photograph of a pod of Atlantic spotted dolphins. The sun was at my back and the dolphins are well lit.
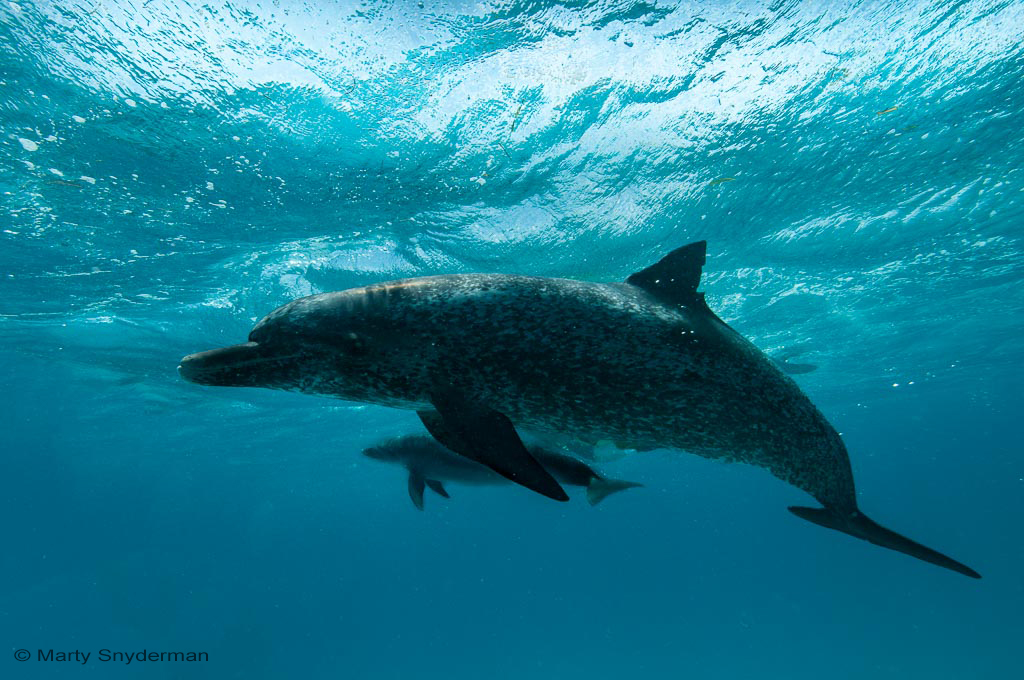
By comparison, when making this image, I was shooting into the sun and the result is far less pleasing.
In this exposure-related scenario, to acquire a proper exposure when shooting in your camera’s manual mode, a good starting place is to use an ISO with a value from ISO 100 to 400 and a shutter speed of 1/125th of a second or faster, such as 1/250th or 1/500th of a second. Set your light meter to evaluate the overall scene (as opposed to spot metering) and set your f/stop according to your light meter reading. Aim your lens (and therefore your light meter) at the subject or scene you want to photograph. You will need to understand how to set and use the light meter in your camera. That information can be found in the manual for your camera.
Shooting in the camera’s shutter priority mode or auto ISO mode instead of the manual mode are methods preferred by many photographers. When using the shutter priority shooting mode, you select your camera’s shutter speed and ISO, and the camera uses its light meter reading to establish the correct aperture to give you the proper exposure for a given shot. When using a camera’s auto ISO shooting mode (a mode available in many, but not all cameras), the photographer sets the desired shutter speed and f/stop, and the camera uses its light meter reading to establish the ISO required to acquire a proper exposure.
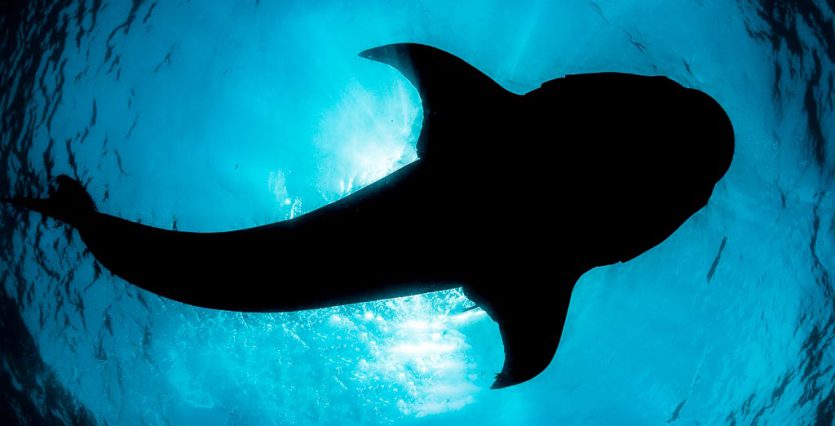
The second exposure-related scenario involves creating silhouettes like this one of a whale shark.
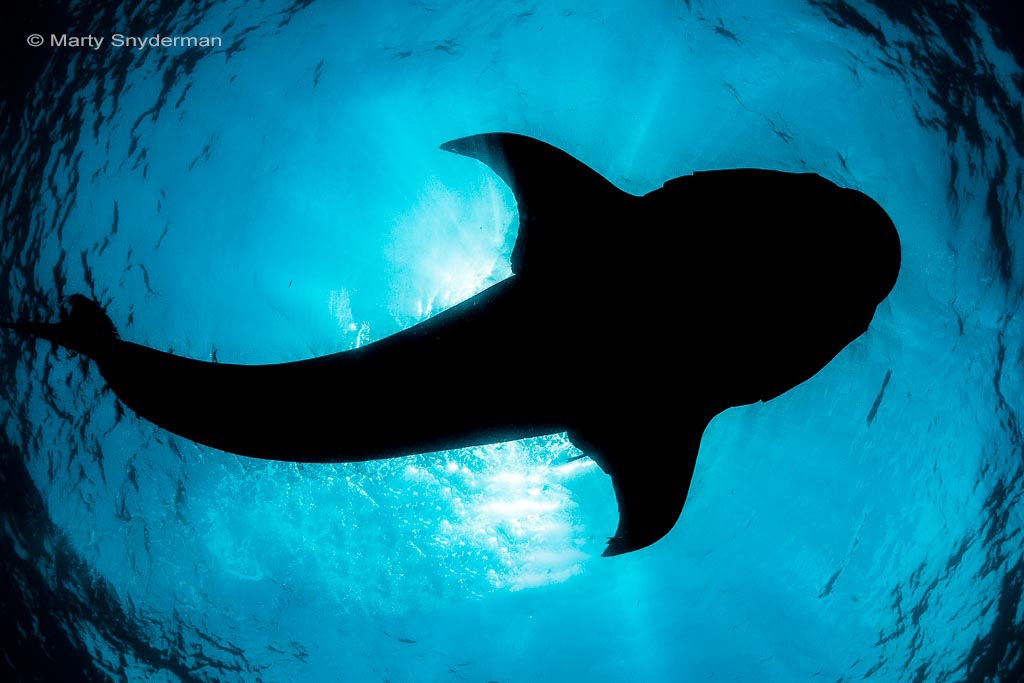
In a properly exposed silhouette, a viewer will see a well-defined, dark shape that stands out in distinct contrast to a lighter background. In underwater photography, this usually means contrasting the dark shape of a relatively large animal, diver, or object such as the hull of a boat against properly exposed, relatively bright, blue or green water that surrounds the dark subject. When intending to make a silhouette, the first thing you want to do is be sure you see a distinctly silhouetted subject when you are composing your shot. If you don’t see a crisp silhouette when composing your shot, your camera won’t be able to record one.
If you don’t see a strong silhouette when you are composing your frame, you will want to change something or look for another shooting opportunity as I should have done before attempting to make a silhouette of a Caribbean reef shark.
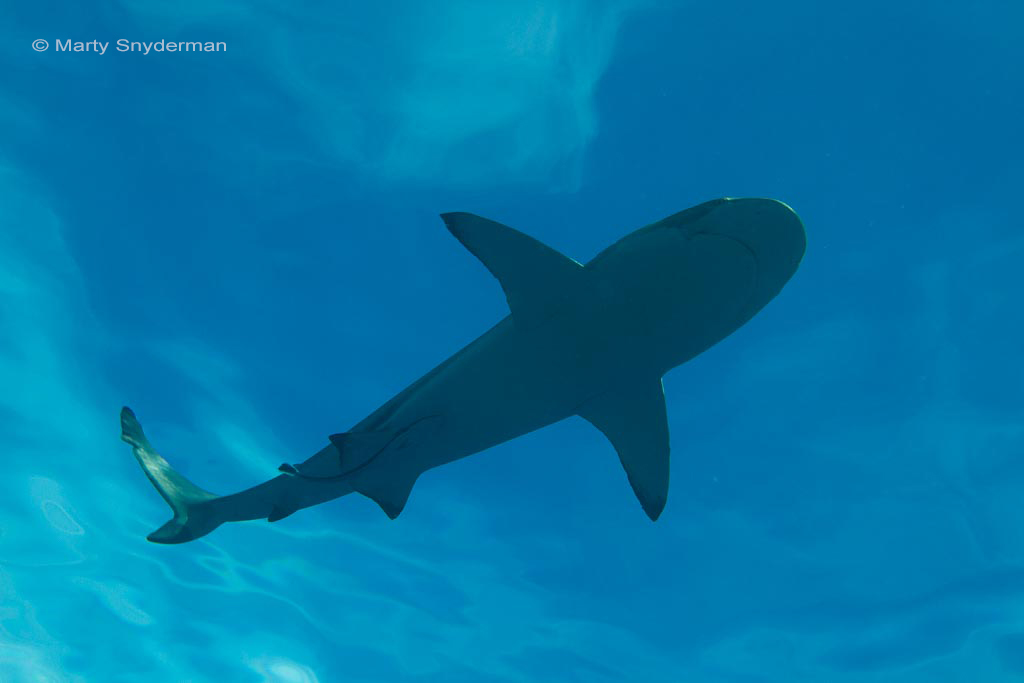
The necessary change might be altering the distance to your subject, your depth, or the angle of orientation to your subject. But whatever the case may be, you need to see a distinct silhouette to make a strong photograph.
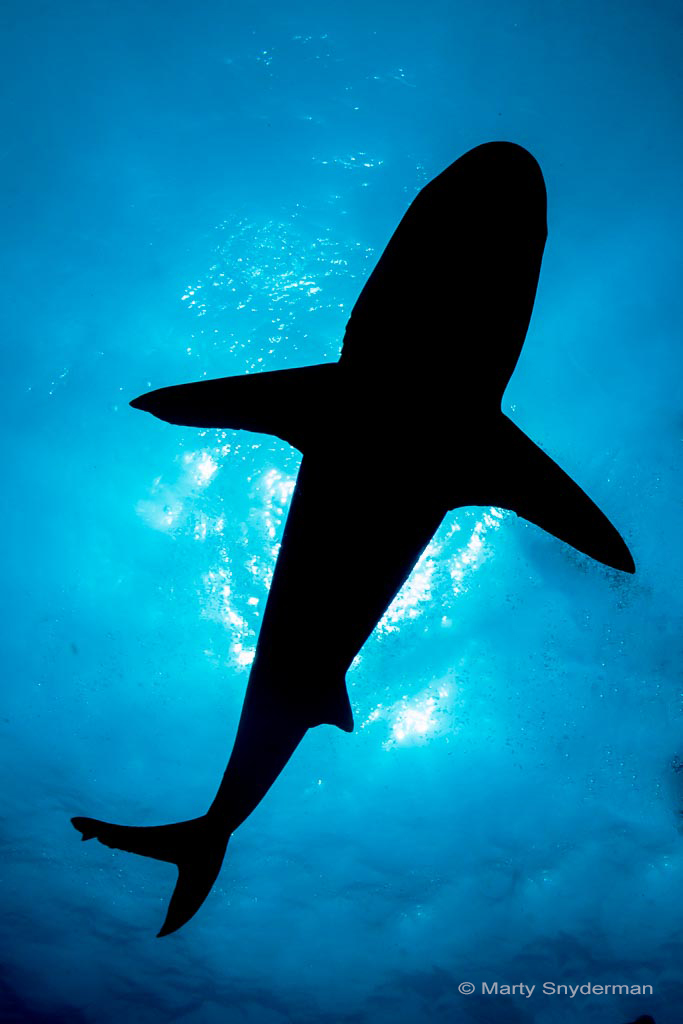
I think you will agree, this silhouette of a shark makes a much more compelling image than the previous shot.
An important difference between the first discussed shooting scenario in which you want to reveal color and detail in your subject or scene and when creating a silhouette is that when creating a silhouette, you will want to use the camera’s spot metering mode to establish your f/stop. Spot metering is the term used to describe taking a light meter reading over a very narrow area, as narrow as three degrees with some cameras.
When taking your light meter reading, point your lens (and therefore your light meter) at the water that borders your subject, not at the subject. This is because you want to properly expose the water that borders your subject, not the subject. In fact, you want the subject to be black or near black in your photograph. The use of spot metering along with carefully aiming your lens will help you take your light meter reading off the water, not off the dark subject or a combination of the water and subject.
A common mistake you want to avoid is taking your light meter reading off bright water that will not be in the photograph. To properly expose the water that will appear in your picture, you need to acquire your light meter reading from that water.
The use of a relatively fast shutter speed will help “freeze any action” and create strong lines of demarcation between the subject and the water that surrounds it. In this scenario, a relatively fast shutter speed means a minimum shutter speed of 1/125th of a second. You might create a more distinct silhouette by using a faster shutter speed such as 1/250th, 1/500th, or 1/750th of a second.
In most instances, you want to set your ISO to a value between 100 and 400.
Set your camera to the manual shooting mode. With your shutter speed and ISO set, your light meter reading will provide information that will allow you to establish the proper f/stop.
If you were to use any “automatic” exposure mode instead of the camera’s manual shooting mode, when you compose your frame and make the picture, the light meter would take its reading from the area where the lens is pointed at the instant the shutter is tripped. If your dark subject is in the part of the frame where the light meter takes its reading, the camera system would attempt to properly expose the dark subject. But that is not what you want to accomplish. You want the water to be properly exposed and subject to be black or almost black.
So, use the camera’s manual shooting mode and spot metering, and take your light meter reading off the water surrounding the subject you want to appear as a silhouette.
Positioning your subject so the sun is directly behind the subject often adds a pleasing effect in a silhouette.
In this scenario, once again you want to be sure to take your light reading off the water, not the subject, the ball of the sun, or the bright, whitish light that surrounds the sun ball.
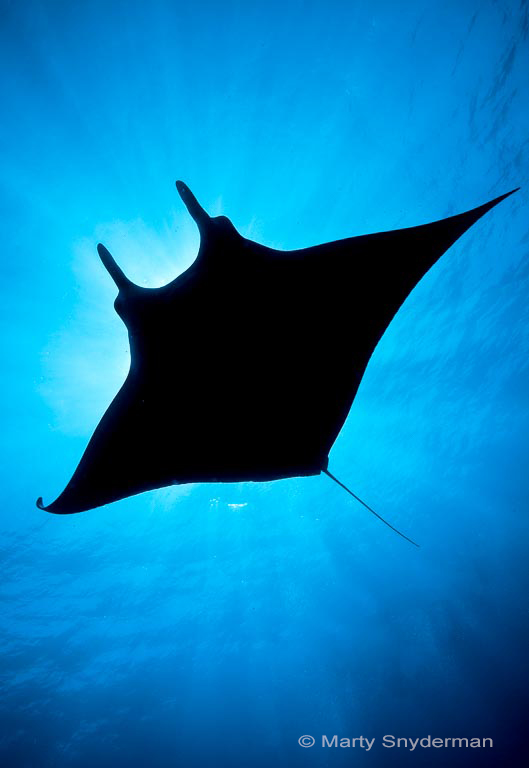
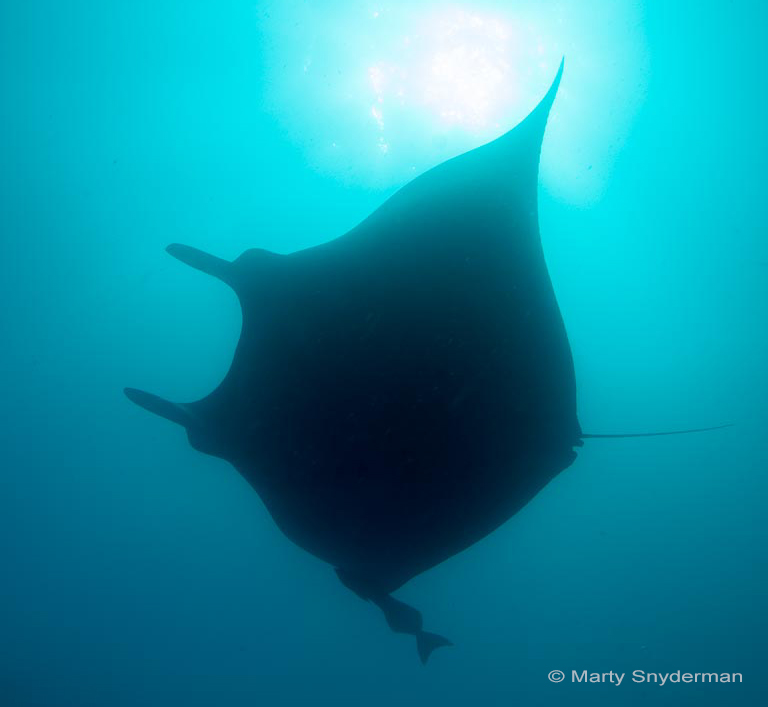
You want your subject to block the sun.
If your subject does not block the sun, the resulting grossly over exposed white water can lead to a far less pleasing result as is the case with this attempt to silhouette a manta ray.
This is a two part series and part two will be published on July, 13 2023